Hits, misses and learnings when 3D Printing 'bot parts
2019-12-20
By Sumit Kumar Maitra
It has been 7 months since PiWars 2019 and believe it or not I have spent more than 175+ hours 3D printing parts for PiWars 2020 and then some for other machining and assembly/disassembly tasks (mostly before I knew if I would get a spot or not).
I actually started this article in early October. A lot of things have changed personally since then, but that's for another post, I'll just finish this and publish it for now (in December)
I desperately wanted to correct mistakes in the 2019 bot and have a 2020 bot ready before I applied. Unfortunately, I failed to have a bot ready before the application, but there were lots of lessons learned, and hopefully the current iteration will be the final design iteration for 2020. Here are some of the things I aimed for and how I went about it.
Note: This post is more applicable if you are planning to build a very custom 3D Printed chassis or parts, some bits do apply to all kinds of machining though.
3D Design
I use Autodesk Fusion 360 (startup edition). The startup edition allows all types of usage until your company is making $100K per year. Given this is a hobby project of mine, I am fine to use it. Other options are Solidworks (proprietary), Open SCAD (Open source), FreeCad (Open source), Blender (Open source) etc. They support a mix of OSes with Windows being the common support baseline. There are some online tools as well like Tinkercad (that I used for my PiWars 2018 bot) and OnShape (that I've never used so can't comment on).
If you are new to CAD, Tinkercad is a wonderful tool. I loved it. The only issue was I couldn't use it on my commute because back in the days the 'offline mode' didn't quite work that great and my spotty Wifi coverage on train didn't help.
All of them with have their quirks, I rage on Fusion sometimes, but Fusion is very actively developed, so more often than not they are improving things with every release (except for the last Christmas release when someone broke a few things and went on a holiday or so I think :D...).
3D Slicer
Slicer is a tool that'll help you convert your 3D Design into 3D Printer understandable code (it is a big long text file mostly). It however needs to know stuff about the Printer so it can produce the best possible output. If you plug the Printer in, a slicer maybe able find out things about your printer if it is a standard one. Mine is a nameless printer so I had select a generic printer setting and setup all the things ground up. These include, speed of head movement, the firmware it is running (Marlin), the bed size, the default head position etc etc.
Cura is among the most popular slicer, that's free. It was created by Ultimaker and based on a free Cura engine that is open source.
I use Slic3R by Prusa research. I just installed the latest release (2.x) and it is pretty much on par with Cura when it comes to features. It has one other thing that makes me prefer it over Cura and that is, its "Send Gcode" to Octoprint functionality. This is has become such and important part of my workflow that I find it impossible to move away. Now it allows me to rename the output before sending to Octoprint so it is even better.
I also love the variable layer height feature of Slic3r.
My Slic3r settings are up on Github here. They are setup for rather slow printing.
Remember, to do a few test prints to make sure your settings are perfect. I just spent two hours unclogging the hotend of my printer because the Slic3r thought it knew better and reduced cooling fan speed to 35%. On my printer if you do this, it results in the heat spreading up to the bowden tube thus melting the filament inside the bowden tube and making it thicker which eventually clogs up and jams the print head. I had started the print job last night and my unsophisticated printer continue running for 6 hours (printing nothing after layer 6/230+) -_-
3D Print server (optional)
A 3D Print server like Octoprint or Repeiter serves the Gcode of your print job to the 3D Printer. Most 3D Printers either need the Gcode file to be on a SD card or be given to it via serial port (USB) layer by layer. Your slicer software can do this, so if you want, you can plug in your printer to your laptop/desktop and after slicing is done it will feed Gcode to the printer. However this means your computer will need to be running all the while the print is in progress. No power saving mode, no hibernation, else 3D Printing stops. This is where print servers that run on small SBCs come in handy. I run Octoprint on a RaspberryPi 3B. I send my code off to Octoprint and then use its web interface to start the job. Once the job is on its way I can let my main computer go to sleep, shut it down or whatever. Also the printer is now tethered to the Octoprint server (OctoPi) not my desktop/laptop.
You could also use cloud based solutions like Astroprint, which is a fork of Octoprint, but I am not sure how that works in this scenario. I suppose you still need a computer connected to the 'cloud' either ways.
Filaments and Slicer/Printer configuration
All 3D Printing filaments are not made equal, so unless you have a 3D Printer that uses DRM protected filaments, you have a very wide variety to choose from. Unfortunately that means everytime you change a brand/colour/type (PLA/PET/ABS), you have to be very aware of your Slicer's configuration. 5 degree hotend temperature difference could make the difference between a successful print and a clogged nozzle.
Building parts light and strong
When I dismantled the 2019 robot I came away with almost 250gms of nuts and bolts used to hold it together. So this year, the target was to be a little more bold with my 3D Printing and print more monocoque components, that required less nuts and bolts wherever possible.
In real terms this means:
- Don't be afraid to use support and print parts with overhangs instead of printing parts separately and bolting them together.
- Use plastic cement to glue parts together if required, will be lighter than nuts and bolts.
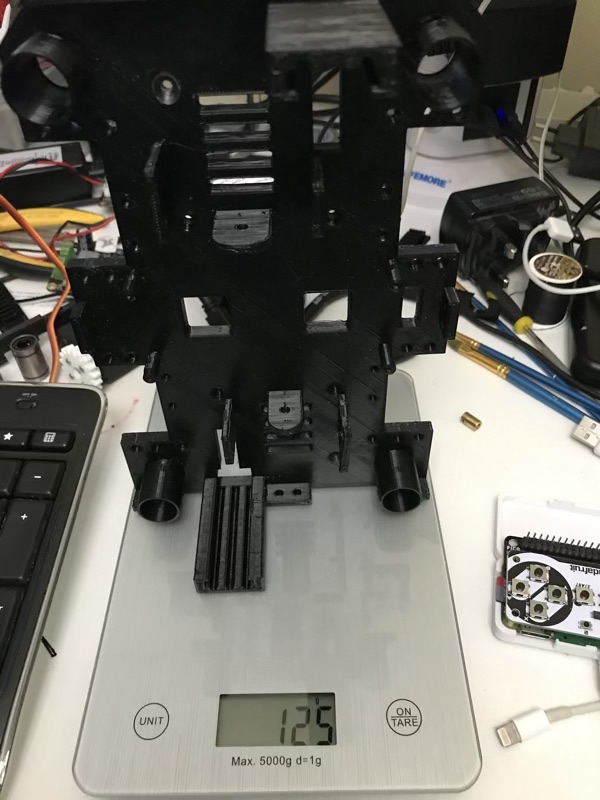
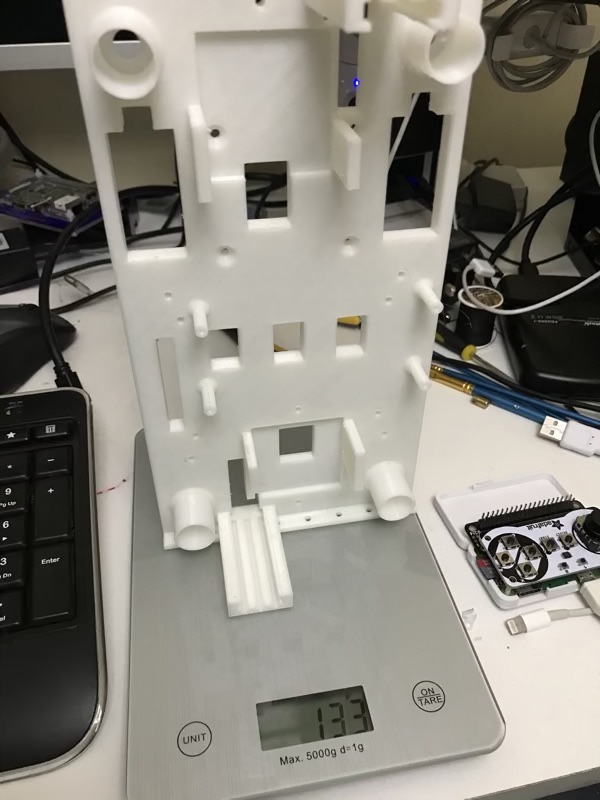
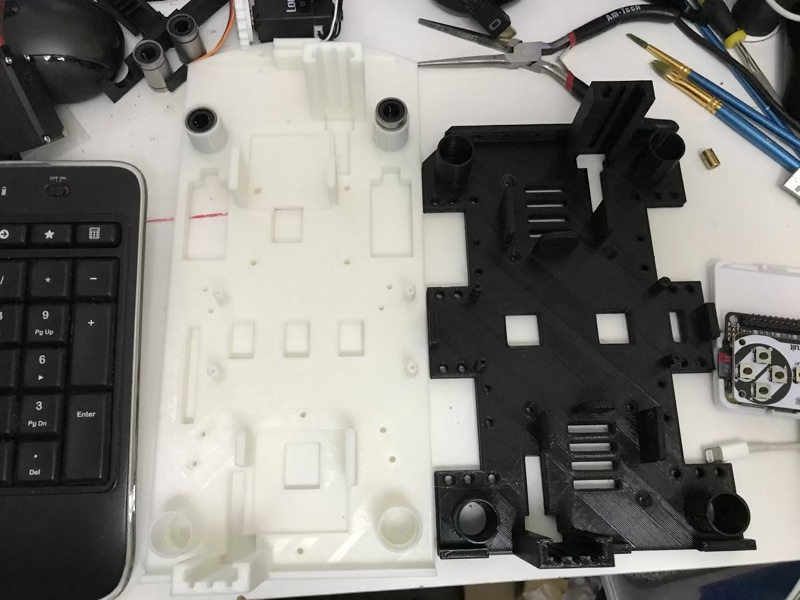
- Use lesser infill and more perimeters/outer shells. I got this tip from Emma Lovelace on Twitter. I had used 30% infill for my previous bot and my Mk1 chassis.. Yes, it was strong and indestructible but it destroyed the motors trying to drive it. You can possibly get away with 10% infill and 3 perimeters. In the following images you see a much bigger part with lower infill having comparatively less weight.


- Be creative with parts in an attempt to reduce size and make things lighter.
- Use cutouts and empty spaces in things like base plates to reduce print times and make things lighter. Additional inner perimeters are a bonus for structural strength. Thanks to Mark Mellors for his tips.

Breakup your build and test small bits first
If you have disparate components that need to fit in or work with a 3D Printed part make sure you print out smaller bits and test the integration points.
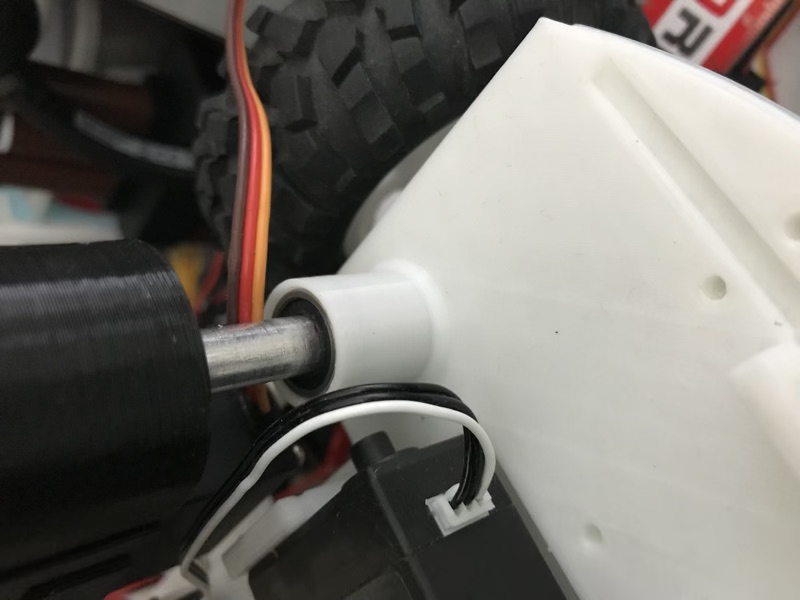
For example I needed my bush to fit into the chassis as tightly as possible but I didn't want to do any filing or dremel-ing to make it fit. So I printed out a cutup of the base chassis and made sure I got the diameter just right. And here is the end result:
Here's a video of my adjustable ground clearance system's independent prototype, before I printed the whole chassis.
Backlash is a key always account for it
Some might argue that if you have a dimensionally accurate 3D Printer you can get away by printing without testing smaller bits. But, tolerances are real anyhwere you go (laser printer, CNC machines...) and 3D Printer tolerances (backlash) is dependent on soo many factors, that even if you tuned the printer just before you started you might be caught short by 200 microns (.2 mm).
And if you have an inflexible item like a steel bush that you are trying to get to fit into a 3D Printed part, 200 microns is enough to crack your printed object if you try to hammer it in.
Design with History turned on
Most CAD solutions will let you save history or timeline of your build (well Fusion 360 does). It is partly cloud based and its default save mode is in the cloud. So every save is versioned. This is crucial because, you can easily go back in version and or back in development timeline to arrange things in right order.
When my first design failed I went back to around midway of my build timeline and scrapped everything after midway. From here, with a nearly clean slate, redid the design. However, thanks to versioned saves, I can easily go back to the version just before I started the new one and still recreate that model.
Parameterise everything
This goes hand in hand with versioning or history. When designing your bot, don't use values directly in the design. Instead, setup parameters and use the parameter names instead. This allows you to
- Reuse the same field value
- Build calculated values based of parameters
- Makes it very easy to change one value and have everything adjust to that change accordingly.
I admit I am not quite adept with using parameters yet. After faffing around with direct values for my first iteration I realised the benefits a 'parametric design' presents when I started removing absolute values and replacing them with either parameters or calculated values based on multiple parameters.
I got bitten the worst when I built my second iteration of the base plate and turned out that I had not applied changes from the prototype corner, to the other three corners, resulting in a 200 micron difference in diameter. That's enough to render a 12 hour print job useless.
Conclusion
Not everyone choses to build a 3D Printed chassis for Pi Wars and it certainly isn't requirement. You can experiment with anything and everything. Laster cut Arylic, laser cut plywood, hand cut plywood, ready made chassis (like the devastator tank), there are lots of ways to get creative.
All I will say is pick your tools early and stick with them. Everyone's learning curve with 3D CAD and Printing is a little different. But designing and building a 3D Printed robot, while exhausting, is a mind blowing experience.
Have fun!
