PiWars 2019 Diary - Mid October update
2018-10-17
By Sumit Kumar Maitra
It's been a month since our last post and our PiWars build has been chugging along slowly but surely. Unfortunately I am not getting solid chunks of time, instead it is little bits at a time, but I've managed to do it regularly. A few things happened since our last post a month ago:
- Our application was selected in the first round of eliminations (massive sigh of relief).
- One of our 'special function' designs have been validated. Our robot now has a adjustable height! Why? Well, we can't reveal yet, it is part of the backstory, in due course though, I promise.
- We managed to setup some pre-requisites.
Getting selected
This year, we took our time to apply for PiWars, so our application had plenty of details on how we wanted to go about building the robot. In fact it had details I can't reveal yet, hence I can't show you my application as of now. Suffice to say the entire form was about 4 or 5 pages long. Long enough for Mike to comment on it :D :D :D. I will release it, once my Bot is complete. As you can see below the only thing I can reveal at the moment is, it has two Raspberry Pis - A 3B+ and a Zero W.
While we are ecstatic that we got selected, quite a few of our friends were disappointed, unfortunately all I can say is I know how you feel :-( but Mike and Tim are in an un-enviable position when they have to pick ~35 contestants from a pool of 90+ applications, so good luck for the next one.
Software Design ideas/braindump
While the CAD design was progressing slowly, I thought it would be a good idea to make sure I can still install everything I wanted on the respective Pis. I call the Pi 3B+ the Cruncher because it is going to do most of the number crunching. The other one is called the Controller because it is going to be responsible for controlling the servos and drive motors.
I could be totally off base on this but my idea is to fully utilise the four cores of a RaspberryPi 3B+, we run various subsystems independently without getting low down to threads and app domains and such. MQTT will be the message bus for the various subsystems. MQTT is using Redis backplane hosted on the Pi itself and by last estimates it could do about 20K+ IOps. I can't really guess if that is enough, seems like a good start.
If the MQTT bus turns out inadequate, we will have to go back to Single-Threaded, run loop.
Hello Bot-Hub: The Pre-requisites
BotHub is the NodeJS application that hosts the MQTT Server using Mosca. It will be running on the Cruncher (the Raspberry Pi 3B+). Following is a dump of the steps I took to setup Redis and NodeJS.
Wwe setup some pre-requisites on our Raspberry Pi 3 B+ that's going to be the byte 'Cruncher' for the robot. Its responsibilities including running the MQTT service bus
Setup Redis (required for Mosca MQTT server)
wget http://download.redis.io/releases/redis-4.0.11.tar.gz
tar xzf redis-4.0.11.tar.gz
cd redis-4.0.11
make
Takes about 2 minutes on a Raspberry Pi 3B+ Run
make test
Takes about 25 minutes to run on Raspberry Pi 3B+
Setting up Redis as a service
These instructions have been copied from https://redis.io/topics/quickstart
Create a directory where to store your Redis config files and your data:
sudo mkdir /etc/redis
sudo mkdir /var/redis
Copy the init script that you'll find in the Redis distribution under the utils directory into /etc/init.d. We suggest calling it with the name of the port where you are running this instance of Redis. For example:
sudo cp utils/redis_init_script /etc/init.d/redis_6379
Edit the init script.
sudo vi /etc/init.d/redis_6379
Make sure to modify REDISPORT accordingly to the port you are using. Both the pid file path and the configuration file name depend on the port number. Copy the template configuration file you'll find in the root directory of the Redis distribution into /etc/redis/ using the port number as name, for instance: sudo cp redis.conf /etc/redis/6379.conf Create a directory inside /var/redis that will work as data and working directory for this Redis instance:
sudo mkdir /var/redis/6379
Edit the configuration file, making sure to perform the following changes:
- Set
daemonizetoyes(by default it is set to no). - Set the
pidfileto/var/run/redis_6379.pid(modify the port if needed). - Change the
portaccordingly. In our case it is not needed as the default port is already6379. - Set your preferred
loglevel. - Set the
logfileto/var/log/redis_6379.log - Set the
dirto/var/redis/6379(very important step!) - Finally add the new Redis init script to all the default runlevels using the following command:
sudo update-rc.d redis_6379 defaults
You are done! Now you can try running your instance with:
sudo /etc/init.d/redis_6379 start
Make sure that everything is working as expected:
Try pinging your instance with redis-cli.
Do a test save with redis-cli save and check that the dump file is correctly stored into /var/redis/6379/ (you should find a file called dump.rdb).
Check that your Redis instance is correctly logging in the log file.
If it's a new machine where you can try it without problems make sure that after a reboot everything is still working.
Installing NodeJS
NodeJS Installation on the Pi 3 is straightforward. Just follow the instructions on the official site
I installed vLatest.
wget -qO- https://deb.nodesource.com/setup_10.x | sudo -E bash -
sudo apt-get install -y nodejs
The MQTT server
You must be wondering why did I use Mosca on NodeJS instead of Paho in Python.
- I already had a skeleton NodeJS App running MQTT that I built a couple of years ago to control my light switches (yet another unfinished project)
- Currently I work in web technologies at work for having the option of throwing something onto a web server be it log or some output or some controls anything, seemed like a good idea.
The application itself is pretty barebones. I don't even use Express, I have a small router that I wrote when I was learning NodeJS, using a library called CrossroadsJS. The crux of the code is in /bothub/server/mqtt/mosca-server.ts. I will not go into the details of the code now, because it is just barebones at the moment. Once I have fleshed it out a little more I'll explain it in more details.
That's all we have got on the software pre-requisites side.
CAD, 3D Print, Repeat...
Apart from the above, all of the other time has been spent on messing around with Fusion 360 and getting down to the nitty gritties of the Chassis. We don't have a moving bot yet, but we have come quite some distance. Here is where we are :

If you are wondering what in the name of Frankenstien is it? Well it is the base of our robot with two servos for height adjustment and one servo for dual Ackerman steering. Yes, this year we will be steering both the front and rear wheels (using the same servo). We also have 4, high speed 12V, (supposedly) 1000 rpm DC Motors. Currently the drive motors aren't powered.
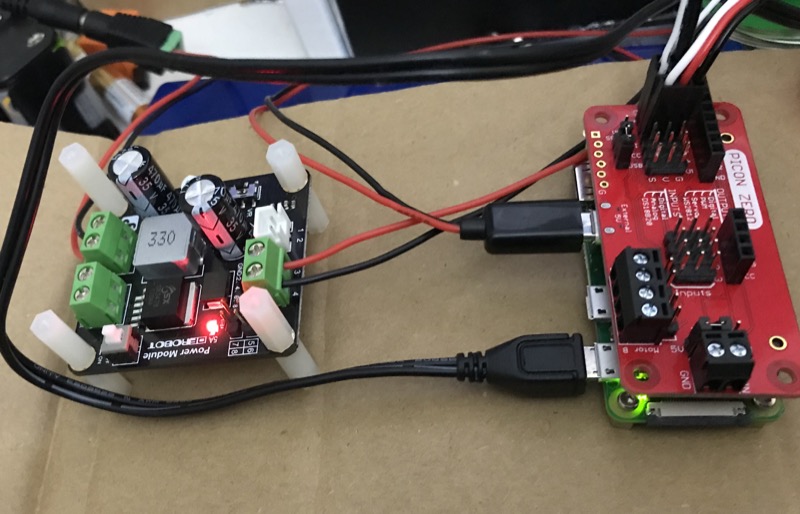
The Servos are controlled by the 4Tronix Piconzero controller. I am using a 12V 2.5A power brick from an old Sky DVR Box at the moment. It is stepped down via a DF Robotics 25W power module that I intend to put on the Robot eventually. Currently the Controller and its power supply is stuck on a bit of cardboard. The Pi Zero W as you can see, is powered independently. That will change shortly as both will derive power from the power module.

The bright red 3D Printed parts look awesome, but if I had the time, they probably won't be as red and shiny. They are printed using Real Fliament's Red PETG. I love this filament. Not to say we haven't had any losses, there is a fair heap of 'not usable' parts, but that's been entirely "wrong/incomplete" design than print failure.
Hopefully we'll have the Ackerman steering going soon, then I can move on to testing the Drive motors for real. Next bit of software is giong to be writing for Controller code to translate Joystick movements and Motor drivers via GPIO).
Next CAD challenge is the Meteor shooter. I have some half done ideas in Tinkercad, time to redo in Fusion 360.
Chucking some Aluminum into the mix
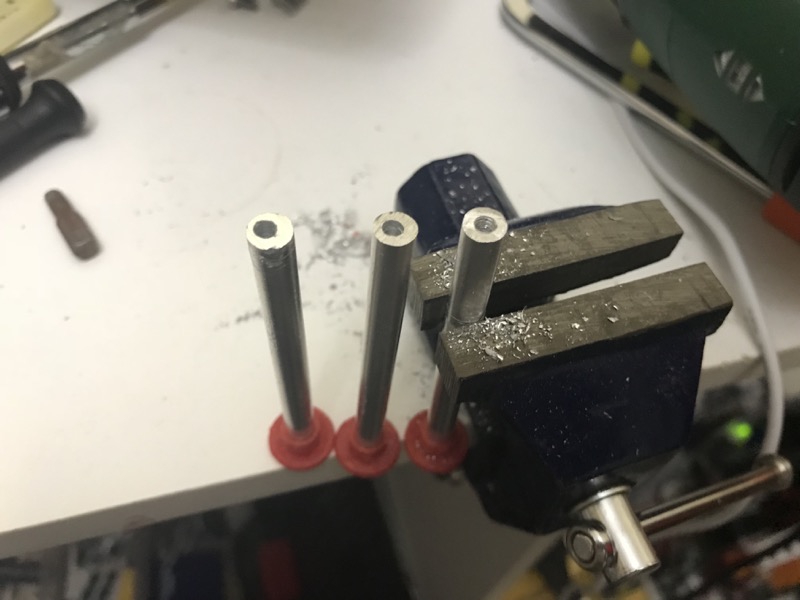
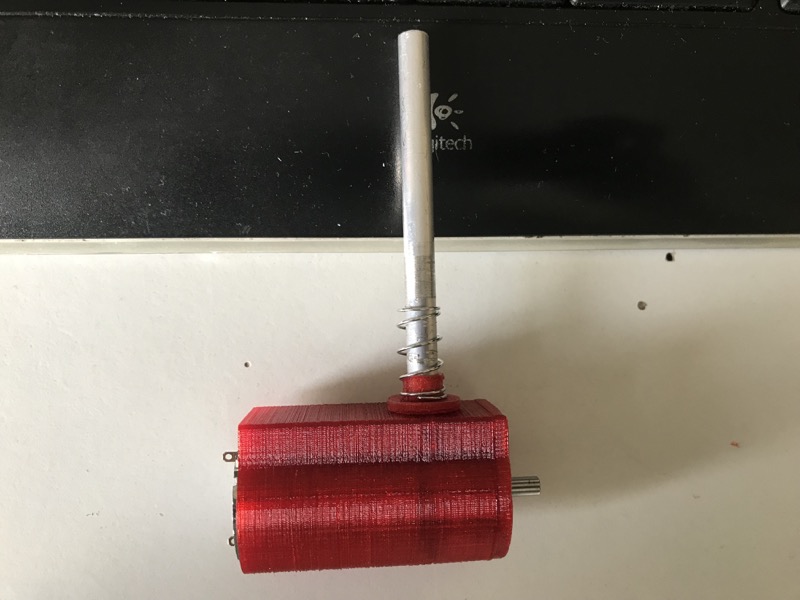
After I 3D Printed the stalks connected to the motors I realised they wouldn't be smooth when trying to push the chassis up or down using the servos. If the height adjuster wasn't smooth it could jam and leave the robot in an unsteady place, so I resorted to Aluminium stalks. Since I don't have access to machining tools, I bought some 6.35mm Aluminium rod off eBay (Thanks imperial measure for not providing something meaningful like 6.9mm or 7.0mm). These were solid aluminum, so I had to up my machining skills from non-existent to can barely drill and tap in aluminium as this picture demonstrates  . However, I did manage to do all 4 bits for the 4 motors, each of them look like this.
 .
.
Felt pretty smug about it myself, once it was done :-)
PiWars is all about community and everytime I get stuck or have a doubt the community doesn't fail to respond. Here are some of the helpful tips I received on Twitter regarding tapping:
So, you mean, tap bits are supposed to be hand turned? No wonder I fluffed my first ever tapping attempt.
— Pi of things (@piofthings) October 14, 2018
Power tapping is possible but usually utilises a sprung chuck.. I hand tap mostly but often using the lathe tailstock or drill press to hold the tap... But no power...
— concrete dog (@concreted0g) October 14, 2018
I use a small battery drill on slow on alu an acrylic, just remember to turn back every so often to break the swarf off
— Extreme Electronics (@ExtElec) October 14, 2018
Yes however you turn the tap the 1/4 back to clear every turn is vital!
— concrete dog (@concreted0g) October 14, 2018
So there you go, don't be afraid to share your failures and shortcomings. There is a good chance someone will notice and help you out. Don't forget to thank them though :-)
That's about it for now. Hopefully, another one towards the end of the month. Happy robot-ing in the mean time!
