
PiWars at home 2021: Back to blogging and hello 'Smokey'
2020-11-20
By Sumit Maitra
Last year, we had qualified for PiWars 2020 and were happily chugging along when personal tragedy struck in October. After a month of suffering, my Dad passed away in November. This dealt a serious blow to my making and blogging morale. (I did give up my PiWars position last year late October). Dad was and will always be my biggest making cheerleader. My hobbies excite me, and I know these things excited him a lot, too. Anyway, the show must go on.
First opportunity I got (to get back into making) was, when I was invited to be a judge at the hastily convened Virtual PiWars 2020. With no thanks to COVID-19, PiWars 2020 had to be postponed indefinitely. Organisers did a brilliant pivot, by requesting participants to send in videos of their robots and their capabilities. It was a fabulous week of video watching as judge and to be honest very hard for me to separate their performances out based on the criteria I had set. In the end there were a lot of bots, very close to each other in points from me. Thankfully other judges were more decisive :D.
Thereafter I joined the maker community in making as many visor headbands I could for the next couple of months until the govt. shut us down.
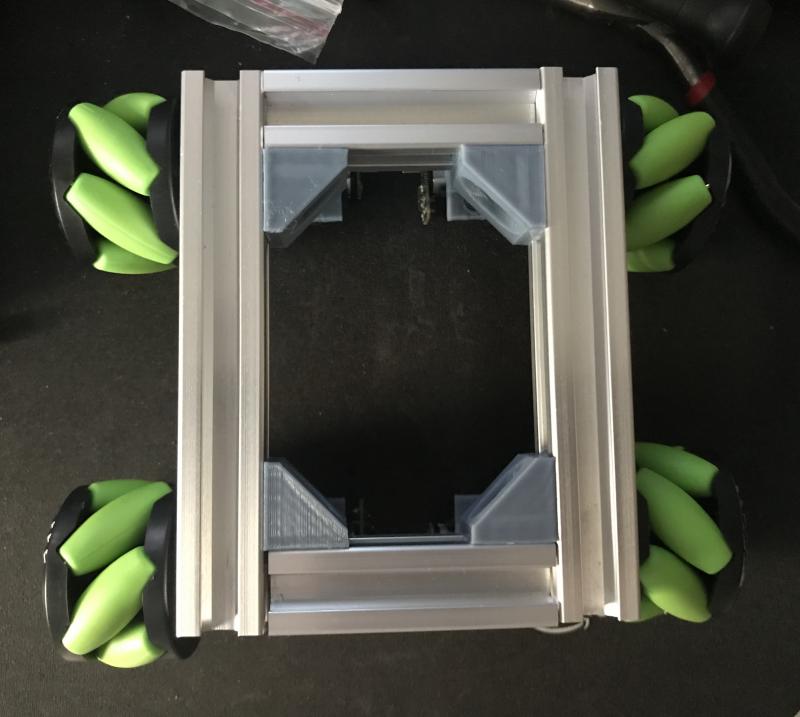
I finally went back to robots around August when I got myself a set of extremely cute mecanum wheels from Pimoroni along with super nice aluminium extrusions. I started making my first Mecanum bot not to participate in PiWars, but just to get hang of what mecanum wheeled bots could do. Past years I've been a bit dismissive of mecanum and ominiwheels because of my misconceptions about their practicality. But over the last year I've seen some great uses of mecanum wheels in real life that piqued my interest enough.
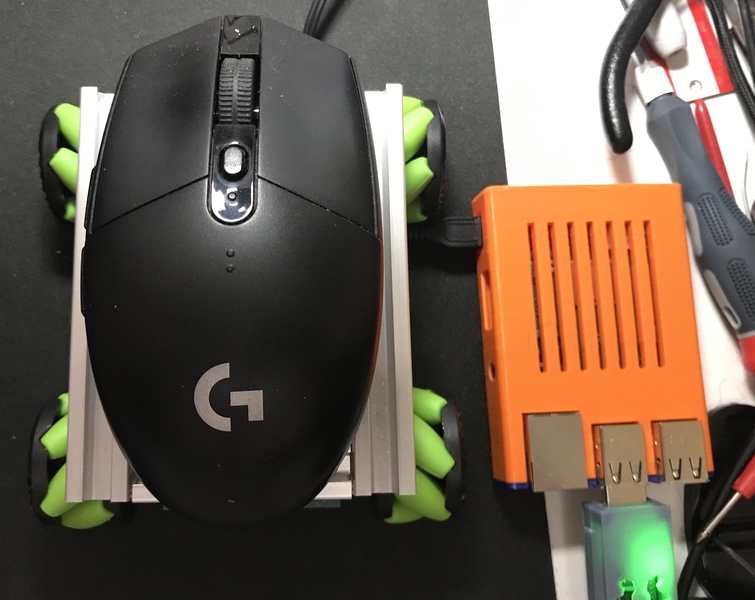
Initial progress was slow as I played around with various ideas for 4 wheeled independent control. I had various options to choose from right in my parts box. I had multiple 4Tronix PiCon Zero boards. These are easy to daisy chain over I2C, I also had one ZeroBorg that itself had control for 4 motors, or I had the options of stacking two RedRobotics Redboards (I had one already). All seemed a bit too elaborate for the footprint I was trying to achieve, 100mm x 80mm.
Here are a few early images using Pimoroni's 15x15mm extrusions. Back then I fondly called it "Mini-mecanum"!
Don't remember if PiWars at home had already been announced or was in the works, but when PiWars at home was announced, I thought long and hard and finally put my application in. This time it was a sedate couple of pages only ;-). The event has three events with seeminly straightforward paths to completion. The bar to complete the challenges is pretty low. But to get chunks of points you start climbing the complication ladder. There are three well defined events and one DIY course where the course was left to us. So I had to come up with a 'stonkingly ridonkulous' idea on what I could do with it. I shall not reveal much more about it lest I loose the motivation to actually do it. Let's just say I have kept aside the last two months to do it, which will probably include a weeks' holiday atleast ;-).
PiWars at home is unique and different from other PiWars event. You get to build/iterate and make videos as you go, and have the opportunity to pick the best one amongst a few. This is not as nerve-wracking as a live event. I think this gives us lot more creative freedom.
So "Smokey"(!) - What's in the name you ask?
A lot... of history... apparently! Being the only team to have broken the infamous Rule 0 (don't be on fire) in PiWars 2019, we had a lot as stake this year. When I was testing the first set of motors, on the first day of assembly I managed to get one motor to emit smoke. I was overvolting 6v motors to 8v, but I didn't quite expect the motor to go poof... well there you had it, "Mini-mecanum" was now "Smokey" for good.
Controlling 4 wheels, Ardunios and Electronic sculptures!
After mulling over all the control options, I had settled down to using two Cytron MDD3A driver boards to drive the 4, Pololu HP Micro metal gear, motors. These I planned to drive directly via GPIO like last time. To make things interesting, I wanted to do this via an Arduino in the middle. Given Atmel AVR processors at the heart of lots of Pi HATs, and I do want to get into HATs someday, I thought why not try out with discrete components first. I'll write a separate post on various Arduino interfacing adventures. Anytime you use discrete components on a bot, as you start putting components together via headers, the number of wires increase to a point where you have a rats nest of wires going everywhere. More discrete the components, bigger the nest. To have the cleanest design you go the other way and stuff all your electronics on one nice board and stick it into the chassis and attach wheels to it, and good to go!
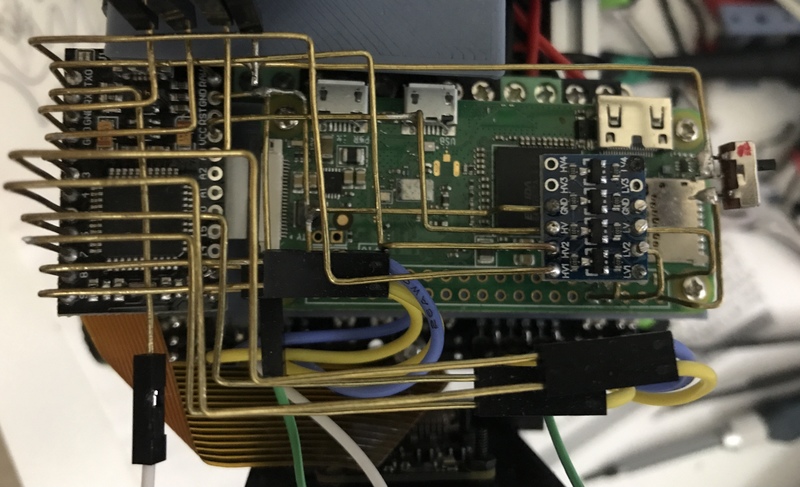
I was determined to find a middle path. I took inspiration from Mohit Bohite's electonics sculptures and thought - could we use hard, brass wire interconnects for almost all (if not all) components in a PiWars robot? Seemed like an extravagent challenge given my soldering skills or lack of it. Undaunted, I put that down in my application. First iteration ended in a disaster, I fried the Arduino while soldering the interconnects. Second iteration I checked the Arduino's status after each solder and after soldering 30 points on the circuit I am happy to report the Arduino and Pi survived. Here's a top view. Obviously it is not a beautiful as any of Mohit's sculptures, but that is a fully functionaly PiZero to Arduino inteconnect via UART. The Arduino also has an Adafruit INA260 connected to it over I2C. The glimpse of yellow and blue wires are the PWM connections to the driver boards. Honest, there is a 'sculpture' there somewhere, you have to look hard, beyond the nested feeling!
Luckily most of the components including the Camera is onboard already and if all goes well I only have one additional component to add for the basic robot build, that's the IMU a BNO55.
I do have to wire up a "GVS Bus" and a "I2C" bus for additional attachments that I am expecting for the "Feed the fish" and "Tidy up the toys" challenges.
Powering the bot
Given last attempts' smokey end, I had to make sure the powersupply and the motors matched this time. So I got the most torquey motors I could find. Also I couldn't trust any of the spring mounted battery holders so I made a really snug fitting battery box to fit 2 x 18650 batteries. These feed into a DF Robots 25W BEC that powers the Pi (which powers the Arduino). The BEC has multiple outputs which will come in handy to power the attachments for chuking fish food or grabbing pesky toy cubes. This time I have not left power monitoring for the last. I've put in an Adafruit INA260 right after the master switch (measuring on the High side). It reports Voltage and Current consumption to the motor driver directly. I intend to monitor typical consumption and then bake in a cut off to prevent the motors from stalling and pulling max current and in process melting things.
Courses
I started building the courses by creating an arena first. I chose to go with black foam-board. I would have loved 10mm but couldn't find any in A2 size. Nevertheless, 1500cm into 1500cm is quite large. I realized this after I tried to layout a 3 x 2 arrangement of A1 foamboards on the dining room floor. Needless to say unless you have expendable space in your garage you can't build the course and leave it there. So I decided to make a 'folding course' that opens like an origami. I have some mad ideas about mechanising it, but I'll probably not get to it.
Problem with computer vision is you need a relatively pristine background so you can't markout all the courses on the floor of your arena because of overlapping lines. It is likely to increase processing power needed to separate out the lines you need and the lines you avoid per course. So I am thinking of having rollup sheets for each course. I had bought black poster paper (a load of it) for the 2019 PiWars courses. Some are still left over. This is going to be experimental because I am not sure how the paper will hold up to the bot scooting all over it. We shall see.
So far I have the folding base down to two pieces (from 6). One more joint and it will be ready to be laid out. Next the walls.
For feed the fish I have found some fancy construction material, I'll reveal in due course as my attachment and build is completed. Suffice to say the fishtank is nearly ready.
I only needed half an excuse to get three rolls of 3D printing filament so I got a Red, Blue and Green roll each and printed out the three cubes we need for "Tidy up the toys" challenge. One of them serves as the pedestal for the bot as I program it :-)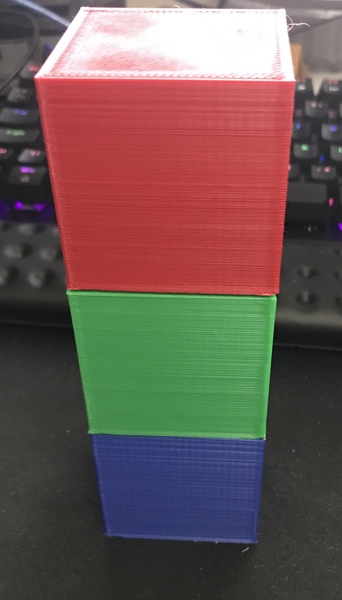
Looking forward
As you can tell from this post, I have a 'story teller' attitude towards writing blog posts. Needs a lot of time and effort. I'll try an post as many updates I can and share my learnings as I go. Good luck to all fellow roboteers, until next time!